
Inner, die-face and outer sizes explained
Inner means clear space, die-face means crease-to-crease panels, and outer means the box envelope. Differences depend on style, axis and caliper T: a universal ±2T rule is incorrect. The tables below match the MakePk tools.
Inner: where the product sits
Check the L/W/H axes first. The mailer L axis includes double end walls. On tuck cartons, L is side depth and W is face width. RSC and lid-and-base trays use their own wall arrangements.
Die-face: what the die maker uses
Use Lm/Wm/Hm for die-face dimensions. Tools convert from the chosen input mode and clamp undersized panels to at least 1 mm. The separate lid is calculated from the base outer size and fit clearance.
Outer: packing and freight
Use outer dimensions for shipping and stacking rather than adding 2T to every die face. Inserts, tape and actual scoring affect the finished pack; check a physical sample and supplier dimensions before production.
Construction diagram
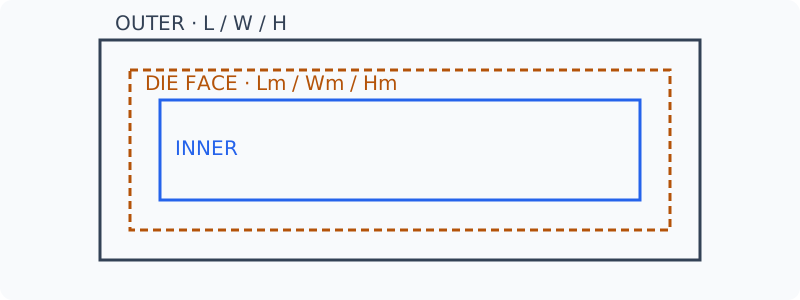
Download diagram SVG (not a production dieline)
Formulas from die-face dimensions (L × W × H)
Lm/Wm/Hm are die-face sizes and T is measured caliper; tuples are L × W × H. Lid-and-base rows describe the base only. At T=0 the three sizes coincide. These are this tool’s geometry models, not universal converter compensation standards.
| Box style | Inner | Outer |
|---|---|---|
| Mailer (one-piece) | (Lm − 4T) × (Wm − 2T) × (Hm − 2T) | (Lm + T) × (Wm + 2T) × (Hm + T) |
| Tuck-end carton | (Lm − 2T) × (Wm − 2T) × Hm | Lm × Wm × (Hm + 2T) |
| Game tuck carton | (Lm − 2T) × (Wm − 2T) × Hm | Lm × Wm × (Hm + 2T) |
| RSC corrugated carton | (Lm − 2T) × Wm × Hm | Lm × (Wm + 2T) × (Hm + 2T) |
| Lid & base: base | Lm × Wm × Hm | (Lm + 2T) × (Wm + 2T) × (Hm + T) |
Worked examples and tool checks
| Box style | Input inner size; caliper T | Die face | Outer |
|---|---|---|---|
| Mailer (one-piece) Check in the tool | 200 × 140 × 50; T=1.5 | 206 × 143 × 53 | 207.5 × 146 × 54.5 |
| Tuck-end carton Check in the tool | 60 × 90 × 150; T=0.5 | 61 × 91 × 150 | 61 × 91 × 151 |
| Game tuck carton Check in the tool | 100 × 70 × 40; T=0.5 | 101 × 71 × 40 | 101 × 71 × 41 |
| RSC corrugated carton Check in the tool | 300 × 200 × 150; T=3 | 306 × 200 × 150 | 306 × 206 × 156 |
| Lid & base: base Check in the tool | 150 × 100 × 50; T=1 | 150 × 100 × 50 | 152 × 102 × 51 |
Practical decisions and common mistakes
Record product dimensions, inserts, inner space, die-face and outer dimensions as separate, clearly named measurements. When comparing styles, keep the content requirements constant and enter them according to each tool’s definitions. Do not infer one style’s inner space from another style’s outer dimensions: wall stacks, tucks and axis directions can differ.
Checks before handing off a file
Changing caliper within the same style can change panels and the outer envelope. Save the old and new parameters and file versions, compare the tool readouts and measure a physical sample. Manufacturing tolerance, handling clearance and compressible inserts are separate from caliper conversion; do not combine all of them into one T value.
Export and sample checks
Open exported SVG, PDF or DXF in millimetres at 100% scale. Measure a known panel and inspect CUT/CREASE/BLEED separately. Cut an unprinted sample and check the product, inserts, tongues and lid before converter review. Diagrams explain the model; they do not include machine kerf, springback or supplier compensation.
Frequently asked questions
- Can I measure just the product itself?
- Include inserts, protective covers, accessories and the way the product is handled. Test the complete contents; one clearance does not suit every product.
- Why not add 2T in every direction?
- Single walls, double walls and fold arrangements vary by axis and style. Use the style-specific formulas rather than transferring one model to every box.
- Does equal volume mean a product will fit?
- No. Proportions, corners and product shape restrict usable space. Geometric volume is a comparison, not a replacement for fitting a sample.
- How do I check printed scale?
- Choose Actual size or 100%, disable Fit to page and measure a known edge. If the layout exceeds the printable area, use suitable paper or tiled printing.
- Do I need a blank sample before production?
- Use the intended material to check dimensions, folds, clearance and actual contents, then confirm processing with the maker. A screen preview cannot replace a physical test.